Showing posts with label Round Tab Punch. Show all posts

Thursday, June 3, 2010

Stampin' Celebration #5


It's already time for another Stampin' Celebration challenge! I loved the colors in the inspiration piece, and I decided to keep with the graduation theme. The colors I picked to use are Soft Suede and Bermuda Bay (an In Color that will be discontinued soon).

To create my pennants, I used the birthday hats stamp from the set Party Hearty. This is an idea I've seen before, although I'm not sure exactly where. I used my Versamarker to ink just the triangles of the hats, and then embossed with Clear Stampin' Emboss Powder. The individual pennants are attached to the Linen Thread, and then up on dimensionals.

The sentiment is from the stamp set Teeny Tiny Wishes. The card is held closed with Hemp Twine. Finished card size is 4" by 4".
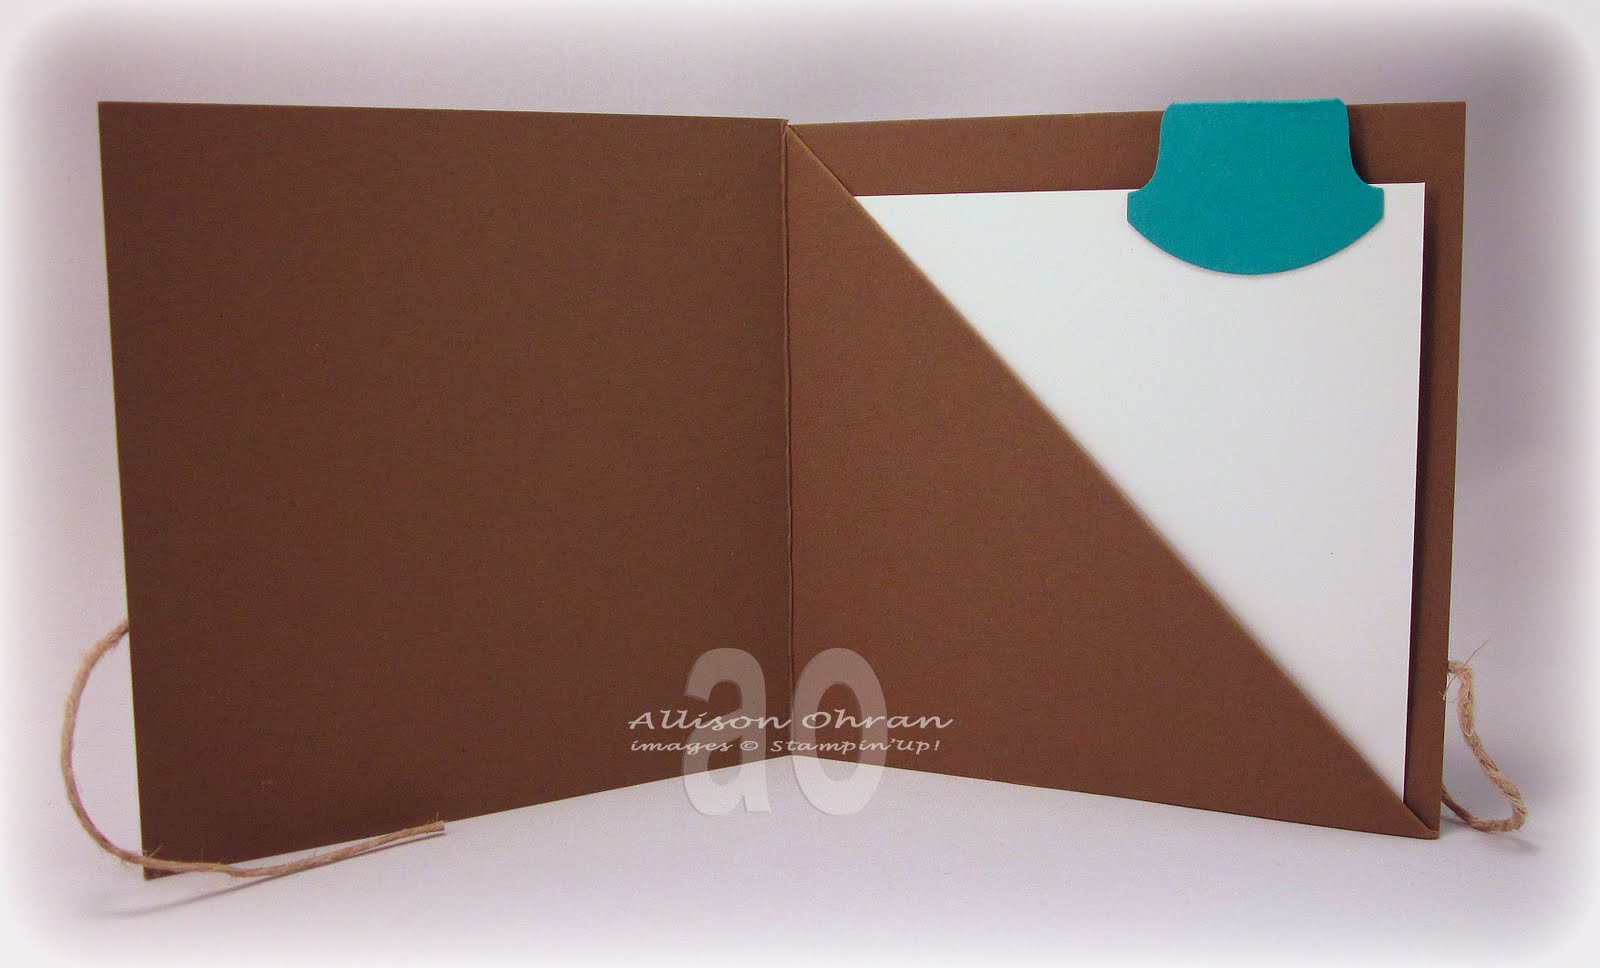
When you open the card, there is a pocket where you can easily add cash or a gift card along with a note. To see how I folded this card, see the second half of THIS tutorial.

Thanks so much for stopping by! Make sure you visit Stampin' Celebration to see what the other members of the Design Team created using this same inspiration piece. We'd also love to have to join us!

Stamps: Party Hearty, Teeny Tiny Wishes
Paper: Soft Suede, Bermuda Bay, Whisper White
Ink: Soft Suede, Versamarker
Accessories: Round Tab Punch, Clear Stampin' Emboss Powder, Heat Tool, Embossing Buddy, Linen Thread, Hemp Twine, dimensionals

Monday, October 20, 2008

Happy Halloween Frankie!


I just love all of the Frankenstein cards that everyone has been making! I saw and adorable one by Karen over at Karen's Korner, and then saw some more over at Splitcoaststampers that used the Top Note Die and the Big Shot. So, I of course had to make one too. :-)

I took a couple pictures of the Big Shot as I was making the card. The first one shows how you layer the Cutting Pad, then the Die, and then the paper. On top you put another Cutting Pad and then you are ready to roll it through the Big Shot.

For this project, I wanted the Frankie face (Kiwi Kiss paper) to be the card base as well. So, I cut and scored my card stock and put the folded edge just below the top part of the die so that the edge wouldn't cut. (Can you see that in the picture? If not, click on the picture to see a larger version.) The last picture shows the base after it goes through the Big Shot and before I added the face.
The face was mostly just made with punches. The mouth is free handed, and the highlight on the eyes were added with a white gel pen. Feeling ready for Halloween now? :-)

Stamps: All Holidays (to stamp 'Happy Halloween' inside)
Ink: Kiwi Kiss (to sponge around edges)
Paper: Kiwi Kiss, Lovely Lilac, Whisper White, Basic Black
Accessories: 1" Circle Punch, 1/2" Circle Punch, Round Tab Punch, Big Shot, Top Note Bigz Die, sponge, White Gel Pen, Basic Black marker

Thursday, September 18, 2008

Silhouettes Gift Card Holder

Here's another quick gift card holder. I made this up after I took pictures of the tutorial the other day. Since I already had the base done, I figured I could just quick embellish. :-) This is what I came up with. The stamps are from the Pocket Silhouettes set (15% off through the end of September!) and the belly band uses the 1" Double-Stitched Chocolate Chip Grosgrain ribbon. There is actually a strip of card stock under the ribbon though to help give it support so that it will slide on and off easier.

The tag is tied on with linen thread and uses the faux metal technique. Oh and if any club members happen to see this today. . . yes, this is one of the projects we are making at Technique Club tonight. :-)

Stamps: Pocket Silhouettes
Ink: Really Rust
Paper: Really Rust, Chocolate Chip, Very Vanilla
Accessories: 1" Double Stitched Chocolate Chip Grosgrain Ribbon, Linen Thread, Word Window Punch, Round Tag Punch, 1/8" Circe punch, Cutter Kit, dimensionals

Tuesday, September 16, 2008

Gift Card Holder Tutorial


Here it is! This is the tutorial for the gift card holder I posted last week (HERE). Since black paper is hard to photograph, I used different colored paper, but of course the idea is the same. . .

Start with a 4 1/4" by 11" piece of paper. Score at 3", 5 1/2", and 8". Then fold so that you have an "M".
Fold in half and use the Word Window Punch to punch out half of the oval shape. Repeat on the other side.

Here I used the top part of the Round Tab punch to punch out a little more and connect my punches from the Word Window punch. Although, you could use a circle punch, tag punch, etc.
***Note--if you want your corners rounded as I did on the graduation card, do that at this point. Do not glue (the next step) until the corners are rounded.***

Open the card and use either Tombow Mono adhesive or Sticky Strip to glue just the edges of the 3 sides of the middle as shown. Don't glue in the middle as this is where the gift card needs to fit.
After you glue, the base of the gift card holder is ready to go! Now you can embellish as desired.

Here's the inside of the Grad card again:
On the graduation card, I used a belly band as my closure. The yellow band is 1" by 7". The silver band and the scallop square are Brushed Silver card stock.

To make the scallop square, I found these great directions by MJ Albright on her blog Beauty Lies Within. Her tutorial about making different sized scalloped squares with the Scallop Edge punch can be found HERE. MJ did a lot of work for us in figuring out the correct sized paper to start with to get perfectly rounded scallops on the edges! For the graduation card I started with a 1 15/16" square piece of card stock. Just make sure you read all her directions (like I didn't the first time!) and don't push your card stock all the way to the back of the punch. Just line it up with the edge of the scallops on your punch.

And finally, to add the yellow to the Designer Brad (Star Assortment). . . .This is a trick that I saw at Convention and finally got around to trying out. All you need is a Craft Pad and your Designer Brad. Here I used Yoyo Yellow.


First just dip the brad face down into the ink. Take a paper towel and wipe it off. I found it easiest to leave the paper towel flat on the table and rub the brad that way. Then dip again and rub it off again. Repeat about 3 times total.What happens is the ink stays in the depressed areas on the brad and rubs off on the rest. Then just let the brad dry and you have a custom colored brad!

Friday, September 5, 2008

Faux Embrace


Although I actually designed this card a while ago, I just finished making some more of these a few days ago for a special order that I had from a friend. Since I had everything out, I thought I would take a few pictures of the process. This card showcases the faux silk technique. I first saw the faux silk technique over on Splitcoaststampers, and just had to try it out. There is a great tutorial HERE. If you haven't ever tried faux silk before, you should as it is really quite simple, and the results are very elegant! Begin by stamping (and coloring if desired) on a piece of tissue paper. A couple of hints--start with a piece of tissue paper that is slightly larger than what you want the finished size to be. Also, when you stamp/color on the paper, make sure there is scratch paper underneath as it will bleed through. Here I used Basic Gray ink to stamp the image from the set Embrace Life, and then colored with a Lavender Lace marker.
Next, crinkle your tissue paper into a little ball and then carefully open it again. Take your glue stick and completely cover your piece of card stock. Adhere the tissue paper to the card stock. You'll want to smooth the tissue paper a little to make sure it sticks, but don't smooth out all the wrinkles as that is what gives the silk look. Trim the excess tissue paper.
Add you desired embellishments. Here I layered the Whisper White card stock onto Basic Gray and then added the Basic Gray Taffeta ribbon, Hodgepodge Hardware frame (now retired), and the sentiment. The sentiment is from the set Fundamental Phrases. I stamped the sentiment first and then used the Small Oval Punch to punch it out.
This card also has a unique fold to create a pocket on the inside. I did not come up with the idea for this particular type of unique fold. I know they showed this unique fold at at least some of the Stampin Up regionals this year. Anyway, to make the base of the card, start with a 4" by 12" piece of Lavender Lace paper. Score at 4" and 8", and then score diagonally connecting the lines. The black lines show where I scored.
Next, fold the right side of the paper down, so that it goes behind the rest of the card stock. You'll want to adhere the two triangles together. Then, fold that bottom section up and use a very small line of adhesive to glue the left side of the right (back) panel to the middle of the card. This creates the pocket. It sounds confusing, but once you try it, it is actually quite easy!
Then add the front to your card (the faux silk panel) and a note to go in the pocket. This also works really well as a nice way to give a gift card!

Stamps: Embrace Life, Fundamental Phrases
Ink: Lavender Lace, Basic Gray, Lavender Lace marker
Paper: Lavender Lace, Whisper White, Basic Gray
Accessories: tissue paper, glue stick, Basic Gray taffeta ribbon, pewter HPH frame, Small Oval Punch, Round Tab Punch, sponge
Technique: Faux Silk, Pocket Card


Wednesday, August 27, 2008

Box in a Bag


Here it is, the ever popular "Box in a Bag"! Diana Gibbs posted an awesome tutorial on her wesite Stampin' With Di and as far as I can tell everyone is making these adorable bags now! Click HERE to see her detailed and easy-to-follow tutorial for making these bags.

When we made these for Technique Club, I made just a couple of slight alterations. For the base piece, I started with a 4 1/4" by 4 1/4" piece of cardstock so that I could get 4 bases (instead of just 2) per 8 1/2 by 11" paper. Another minor change I made was that I scored at 3/4" around the edges instead of at 1".


Then I just followed Diana's tutorial and folded along all the scored lines, folded them up, and glued them to form the base of the box. Another minor change I made was that I cut my designer paper to 6" by 12" (half a sheet of Designer Paper). The picture at the very top of the post shows the bag made with Bella Rose Designer Paper, and in the following pictures I am using Hawaii Papaya Designer Paper.

I took a couple quick pictures as I was making the bag, but again for a more detail explanation and more pictures head over to Diana's tutorial.

To decorate the bottom of my bag, I of course wanted to use my new scallop edge punch! I used a strip of 12" by 1 1/4" Chocolate Chip paper. For those who haven't used the scallop punch yet, it is really easy! Put the paper in and punch the first time. Then just slide the paper along, line it up with the scallops on the guide on the punch, and then punch again. The punch does all the work of lining the scallops up for you. Whoever came up with the idea for this punch with the guide is genius!


After I punched that, I used my white gel pen to add some detail and then wrapped the strip around the bottom of the bag. I used the Round Tab punch for the handles (again this idea was from Diana's tutorial) and ribbon to tie everything up. Here's the final product.


Bag #1:
Paper: Bella Rose Designer Paper, Kiwi Kiss, and Riding Hood Red
Accesories: Kiwi Kiss Satin Ribbon, Riding Hood Red Taffeta Ribbon, Scallop Edge Punch, White Gel Pen, Round Tab Punch, 1/2" circle punch, Crop-A-Dile, Sticky Strip

Bag #2:
Paper: Hawaii Papaya Designer Paper, Chocolate Chip, and Tangerine Tango
Accesories: Kiwi Kiss Satin Ribbon, 5/8" Chocolate Chip Grosgrain Ribbon, Scallop Edge Punch, White Gel Pen, Round Tab Punch, 1/2" circle punch, Crop-A-Dile, Sticky Strip