Showing posts with label In Color 09-10. Show all posts

Tuesday, June 22, 2010

Lots of Flowers


Today I have two more cards to share that we made at the 10-10-10 class. This first card shows the Die Cut Blooms found on page 169 of the catalog. These are one of those items that is easy to miss in the catalog! With the die cut blooms you receive 4 12x12" sheets of pre-cut flower pieces.

The flowers are all from the die cuts, and then the brads in the center are the Fire Circle Rhinestone brads. The leaves were created by using the 5-Petal Flower Punch. I used one punched image cut into pieces for all the leaves on this card.

By the way, I got the idea for this card from a swap I received at convention a while back. The only name on the back of the card was Jael.

Stamps: Thank You Kindly
Ink: Chocolate Chip
Paper: Chocolate Chip, Old Olive, Whisper White
Accessories: Blooms Die Cuts (p. 169 of catalog), 5 Petal Flower Punch, Old Olive Grosgrain Ribbon, Circle Fire Rhinestone Brads, Big Shot, Top Note die, dimensionals

Note: Items marked in red are retiring.


And another fun flower card! This is an idea that came from Margret Moody. You can see her adorable card HERE. I know I'm not the only one that loved her idea as I've seen several versions of this card posted various places around the web. :-) This card is basically just a lot of circle punches and a few colored buttons. The leaves are actually the bird wing from the Extra Large Bird Punch.

Finished card size is 5 1/4" by 5 1/4".

Ink: Melon Mambo
Paper: Bermuda Bay, Tempting Turquoise, Green Galore, Melon Mambo, Pretty in Pink, Pumpkin Pie, Summer Sun, Whisper White
Accessories: Bermuda Bay Polka-Dot Grosgrain Ribbon, Fresh Favorites I and II colored buttons, Extra Large Two Step Bird Punch (for leaves), 1", 1 3/8". and 1 3/4" Circle Punches

Note: Items marked in red are retiring.

Monday, June 21, 2010

Surf's Up

This week I'll be posting cards that we made last Saturday at a 10-10-10 class I hosted. This is one of the cards that we made, and I think it ended up being one of the favorites too! All of the cards we made at the class focused on stamp sets, colors, and accessories that are retiring.

The idea for this card came from Krystal over at Krysta's Cards and More. See THIS post to see her adorable surf card and matching ensemble. I love all the detail that Krystal had on her card, but I wanted to simplify a bit since this was supposed to be a card that you could make in 10 minutes.

This card uses the set Just Surfing. The surf boards were stamped and then cut out. To create the 'sand', I just tore the edge of the card stock and then added a little sponging. The hemp twine is two pieces tied together.

Thanks for stopping by!

Stamps: Just Surfing
Ink: Only Orange, Green Galore, Soft Suede, Bermuda Bay
Paper: Soft Suede, Bermuda Bay, Whisper White
Accessories: Hemp Twine, sponge

Note: Items marked in red are retiring.

Thursday, June 3, 2010

Stampin' Celebration #5


It's already time for another Stampin' Celebration challenge! I loved the colors in the inspiration piece, and I decided to keep with the graduation theme. The colors I picked to use are Soft Suede and Bermuda Bay (an In Color that will be discontinued soon).

To create my pennants, I used the birthday hats stamp from the set Party Hearty. This is an idea I've seen before, although I'm not sure exactly where. I used my Versamarker to ink just the triangles of the hats, and then embossed with Clear Stampin' Emboss Powder. The individual pennants are attached to the Linen Thread, and then up on dimensionals.

The sentiment is from the stamp set Teeny Tiny Wishes. The card is held closed with Hemp Twine. Finished card size is 4" by 4".

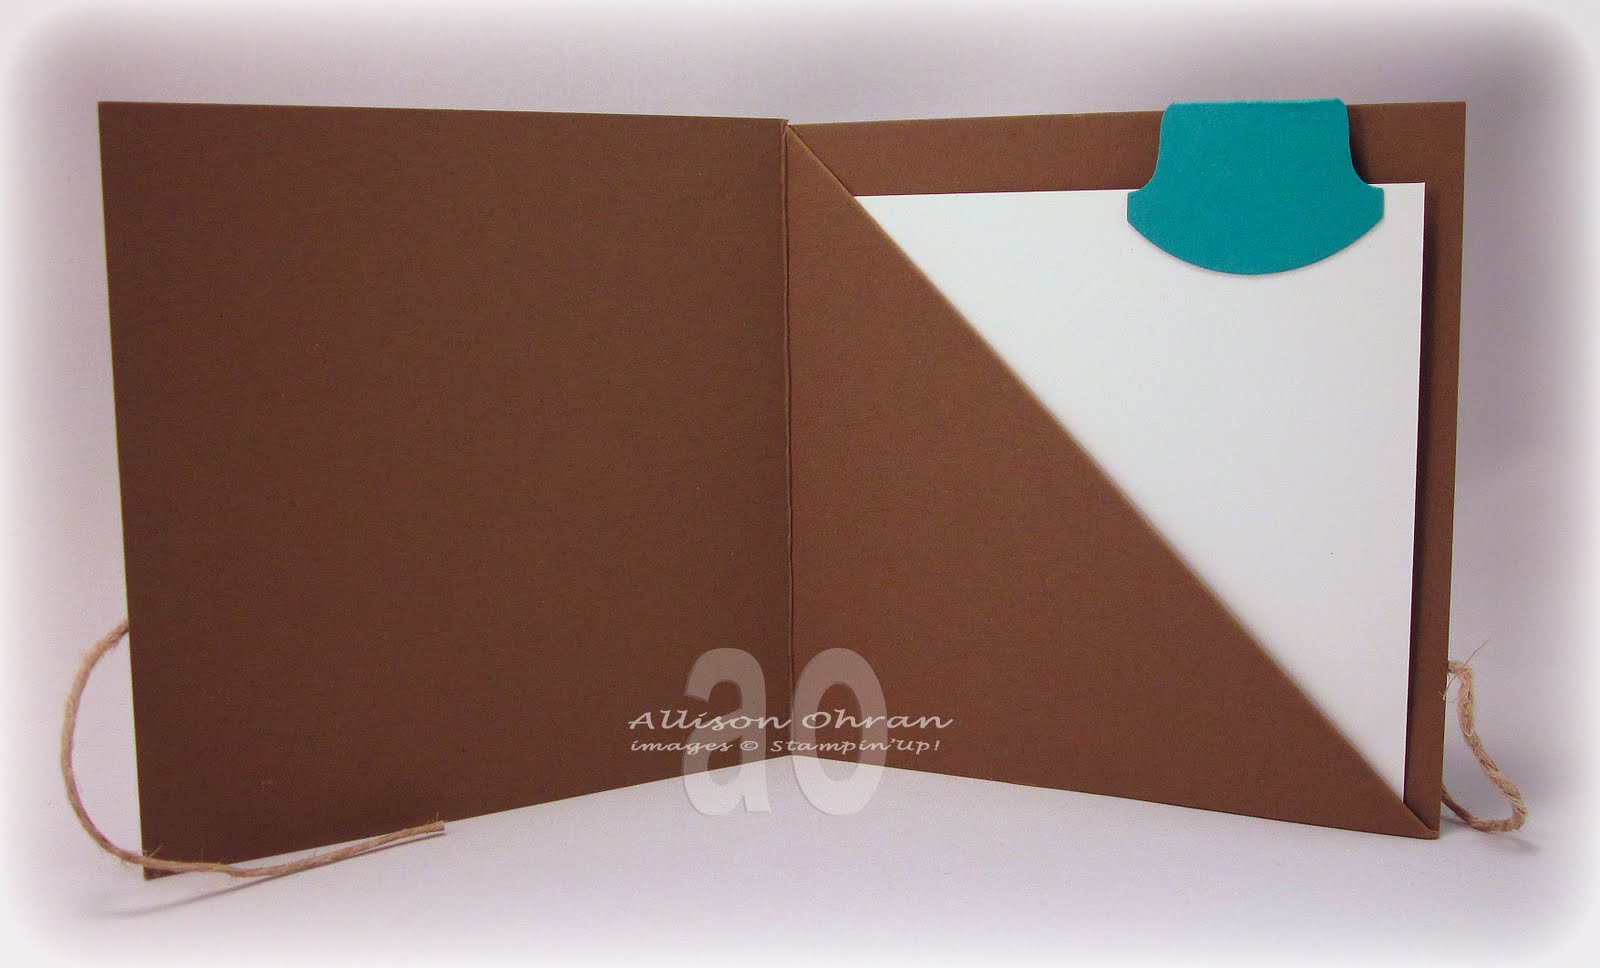
When you open the card, there is a pocket where you can easily add cash or a gift card along with a note. To see how I folded this card, see the second half of THIS tutorial.

Thanks so much for stopping by! Make sure you visit Stampin' Celebration to see what the other members of the Design Team created using this same inspiration piece. We'd also love to have to join us!

Stamps: Party Hearty, Teeny Tiny Wishes
Paper: Soft Suede, Bermuda Bay, Whisper White
Ink: Soft Suede, Versamarker
Accessories: Round Tab Punch, Clear Stampin' Emboss Powder, Heat Tool, Embossing Buddy, Linen Thread, Hemp Twine, dimensionals

Monday, April 26, 2010

With All My Heart


Today I have some more sample for you using the stamp set With All My Heart and the the Extra Large Fancy Flower Punch. These were some of the Make and Takes from Leadership this year. This first cards uses the color Old Olive, Pretty in Pink, Melon Mambo, and Bashful Blue.


This card uses the same colors, but adds Soft Suede too. I just love this bright color combo, and it's one that I would probably never put together by myself. This little milk carton is the new die that can be found in the Occasions Mini Catalog. Too cute!!

Stamps: With All My Heart; Dot, Dot, Dot; A to Z
Ink: Old Olive, Bashful Blue, Melon Mambo, Pretty in Pink, Soft Suede, Old Olive marker
Paper: Old Olive, Bashful Blue, Melon Mambo, Pretty in Pink, Soft Suede, Bashful Blue DSP, Confetti White
Accessories: Extra Large Fancy Flower Punch, 1 1/4" Circle Punch, Bashful Blue Striped Grosgrain Ribbon, Linen Thread, Old Olive Grosgrain Ribbon, Melon Mambo Polka-Dot Ribbon, Clips Assortment, Scallop Square Punch, Mat Pack, Paper Piercing Tool, dimensionals, Mini Milk Carton Die, Big Shot

Monday, April 19, 2010

More Vintage


Do you love the stamp set Vintage Vogue yet? If not, here are a few more projects to try to convince you. :-) These are actually make and takes from the Phoenix Regionals in January. I love the clean, simple look of these projects.

The card on the right is also made with Vintage Vogue, and the tag on the left uses the set With All My Heart and Dot, Dot, Dot. Enjoy!

Stamps: Vintage Vogue, With All My Heart, and Dot, Dot, Dot
Ink: Rich Razzleberry, Crushed Curry, Old Olive, Bashful Blue, Rose Red marker
Paper: Kraft (Crumb Cake), Rich Razzleberry, Bashful Blue, Crushed Curry, Soft Suede, Rose Red, Old Olive
Accessories: Scallop Edge Punch, 1 3/4" Circle Punch, Mat Pack, Paper Piercing Tool, Clips Assortment, Playground Designer Buttons, Button Latte Designer buttons, Linen Thread, Crushed Curry Polka Dot ribbon, dimensionals

Wednesday, April 14, 2010

Vintage Razzleberry

Remember the Color Renovation announcement? I'm so excited about the Color Renovation, partially because we have several In Colors returning! One of these colors is Rich Razzleberry--one of my all-time favorite In Colors. Of course I do love purple, so it's not too surprising. :-) I created this card using the stamp set Vintage Vogue from the Occasions Mini Catalog.

For the background paper, I started by using my Big Shot and my Lattice Die to cut a lattice out of scrap paper. I layered the lattice over my Very Vanilla card stock and sponged. I lifted the lattice off, and then repeatedly stamped the vine image from the stamp set. Next I lightly sponged over the top of everything. After I did all of my stamping and sponging (with Rich Razzleberry), I cut the card stock into 4 pieces and distressed all the edges with my cutter kit.

For the sentiment panel I stamped all the flowers and leaves and then cut them out--not the type of detail work I usually do, but I occasionally make an exception. :-) The centers of the flowers have Crystal Effects and Dazzling Diamonds glitter, and then the flowers are popped up with dimensionals.


Stamps: Vintage Vogue
Ink: Rich Razzleberry (and marker), Old Olive, Summer Sun marker
Paper: Rich Razzleberry, Very Vanilla
Accessories: Stampin Up Lattice Die, Big Shot, cutter kit, sponge, dimensionals

Monday, March 22, 2010

Happy Sale-A-Bration


The Sale-A-Bration countdown has begun! There is only a little over a week left to take advantage of this great opportunity! What's Sale-A-Bration? The best Stampin Up Promotion of the year! ;-) You can take advantage of Sale-A-Bration by:

1. Spend--With each $50 purchase you can choose a Sale-A-Bration product of your choice for FREE! See the brochure HERE. To shop online, visit my website www.allison.stampinup.net and click on "shop now" in the top right corner.

2. Join--Have you ever thought about becoming a Stampin Up demonstrator? Whether you are looking for a business opportunity, or a discount on your crafting supplies, Stampin Up has a place for you! If you join the Stampin Up family before the end of March, you not only receive a 15% discount off the starter kit (already a great value!) you can also choose a FREE stamp set from the Idea Book and Catalog! Contact me today so we can chat about the wonderful support and opportunities that Stampin Up provides for its demonstrators.

And now back to the card. :-) This card shows off two of the items that you can earn for free during Sale-A-Bration--The stamp set Happy Moments, and the Scallop Trim Border Punch.

I used my Blender Pens to color the flowers, my Cutter Kit to distress the edges of the white layer, my Scallop Trim Border punch to add the decorative edge on the Rich Razzleberry layer, and a bit of Organza Ribbon to a touch of elegance to the card. So simple!

Stamps: Happy Moments
Ink: Basic Black, Rich Razzleberry, Pale Plum, Certainly Celery Marker
Paper: Pale Plum, Rich Razzleberry, Whisper White
Accessories: Blender Pens, Cutter Kit, Scallop Trim Border Punch, Whisper White Organza Ribbon, dimensionals

Saturday, February 20, 2010

Birthday Blog Hop!


Welcome to stop #13 on the Stampin' Addicts Birthday Blog Hop! This Blog Hop features 24 Stampin' Addicts members. Since we are celebrating the first birthday of Stampin' Addicts, each stop will provide awesome birthday ideas!

If you are traveling forward in the hop, you just visited Krystal's blog "Krystal's Cards and More!" where she showed us some fabulous ideas for tween boys using a surf theme.

Today I am showing some ideas for young boys. The projects I'm showing are also simple--it seems whenever I am running off to a children's party, I only give myself a few minutes to put the card and gift wrap together. So, here are a few quick and easy birthday ideas.


My first project is a card. I pulled this layout from Stampin' Success (a magazine for Stampin' Up! demonstrators) and used the set Happy Moments--a set you can earn for free during Sale-A-Bration. :-)

What I love about this card is that with the go-to layout, the colors (or stamp set) can easily be adapted to any birthday you need a card for--girl, boy, or adult. Here I used the colors Green Galore, Bermuda Bay, and Crushed Curry.

You'll notice I used the card as an inspiration for the remaining projects. Next up is a gift bag; I love how easy it is to personalize gift wrapping! I always keep white gift bags on hand so that I can quickly add a personal touch to a gift. Here I simply stamped along the top of the tissue paper and then added a ribbon and tag.


Next up is this cute little bag. This project was inspired by several different ideas that I saw at the Phoenix Regional I attended in January. I took one of the fabulous Glassine Envelopes (from the Occasions Mini Catalog) and ran it through the Big Shot with the Perfect Polka Dots Impressions Folder to give it a little texture. Then I created a Bag-a-lope and decorated with lots of punches, ribbon, and a few brads. Note: the scallop circle is from the Pennant Big Shot Die.

I think this would be a fun way to give a small gift or gift card, or a perfect little party favor.


And, last but not least, what is a birthday without a party hat? This party hat is so easy to make using two Pennant Big Shot Dies adhered together at the edges. My friend Cindy recently showed me how to curl paper, so I had to add a few curled papers to the top of the hat to make it a bit more festive. :-) And although it doesn't show in the picture, I sprayed the hat with Shimmer Paint to give it a little sparkle.


Next on the Bog Tour is Joyce over at Stampin' Central. Head on over to see her "sister-practical and pampering ensemble." You won't want to miss it!

Thanks so much for stopping by! I hope that you've enjoyed these projects.

Saturday, January 16, 2010

Hello Again: A Blog Tour


Welcome to stop #15 on the 2010 Stampin' Addicts Sale-A-Bration Blog Tour! This Blog Tour features 21 Stampin' Addicts members, each showcasing a different Sale-A-Bration item. Each stop on the tour gives you fun and fresh ideas for those items that you can earn for free during this great promotion!

If you are traveling forward in the hop, you just came from Holly's blog "Rubber Redneck" where she featured the set Forest Friends. Too cute!

Today I am showcasing the set Hello Again--a set from the big Idea Book and Catalog. Although this set is found in the main catalog, during Sale-A-Bration you can earn it for free! Not only are there 6 products you can earn for free in the SAB brochure, there this also a list of sets from the main catalog that are part of the promotion!

My first project was inspired by the upcoming holiday--Valentine's Day. Although simple, it has a lot of sparkle. :-) Fished card size is 4" by 4". Inside the 'shaker' part of the card I added Micro Beads and Dazzling Diamonds (glitter). The sentiment is from the set Teeny Tiny Wishes.
The next project showcases this cute little butterfly. Finished card size is 5 1/4" by 3 3/4". To give the butterflies some wings and dimension, I stamped the butterflies on the Whisper White card stock and then again on vellum paper. I embossed with Iridescent Ice, cut out the butterflies, and carefully added them to the card. These butterflies are ready to take flight!
I am excited to share this last project! If you've ever made a slider card, you know how fun it is to have a little surprise pop up. . . . Well I thought I would be extra fun to have a sweet treat pop up. :-) I love the new Treat Cups from Stampin Up, so I combined the two ideas and came up with this. Closed. . . .
Gently pull on the ribbons, and then, surprise, a little note, AND a fun treat!
The tag on the top pulls out to allow you to eat the candy without tearing any paper. This project also features the Scallop Trim Border punch which is another item you can earn for free during Sale-A-Bration!

Check back next week for more details, chit chat, and full recipes for each of these projects!

Next on the Blog Tour is Sarah's blog Lily's Ink Pad where she will be showcasing the set Just Football.

Thanks for stopping by! I hope you enjoyed seeing these projects made using the set Hello Again.

Monday, September 28, 2009

Cupcake Birthday


Happy Monday! Here is a card I made for the CAS34 challenge over at Splitcoaststampers.

All of the white you see is Glossy card stock--one of my favorite products. :-) I used Basic Black craft ink to stamp the cupcake, embossed with Clear Stampin' Emboss Powder, and then colored. I used Soft Suede, Regal Rose, Apricot Appeal, Bermuda Bay, and Green Galore markers. To color the frosting, I used a Blender Pen and ink from the top of my Regal Rose stamp pad.

After I let that dry a minute, I used Frost White shimmer paint to give the flame and the sprinkles a little sparkle. To apply the shimmer paint, I used a toothpick and carefully applied the paint to those small areas.

I used my Circle Scissors Plus to cut the circles. The white circle is approx 1 7/8" in diameter, and the Soft Suede circle is approx 2 1/8" in diameter. The finishing touch is the Soft Suede 1/2" Polka-dot Grosgrain Ribbon. Finished card size is 4 1/4" by 4 1/4".

Stamps: Crazy for Cupcakes
Ink: Basic Black Craft pad; Soft Suede, Regal Rose, Apricot Appeal, Bermuda Bay, and Green Galore markers; Regal Rose Classic pad
Paper: Glossy White, Soft Suede
Accessories: Blender Pen, Soft Suede 1/2" Polka-dot Grosgrain Ribbon, shimmer paint, Circle Scissors Plus, heat tool, Clear EP, dimensionals

Tuesday, September 22, 2009

Two Challenges, Two Cards

Yesterday over on Splitcoaststampers there was a Clean and Simple (CAS) sketch challenge and a Technique Lovers (TLC) challenge. Both caught my eye so I went to work! I had so much fun that I ended up making two cards--both fill the requirements for both challenges.

The TLC challenge was to make a five layer button. Basically you use paper layered on top of each other with Crystal Effects on top to make a button. How simple! You can make the 'button' in any color or shape. See the post HERE for more detailed instructions.

To make the 'buttons' on the card above, I punched out 12 flowers with my Boho Blossoms punch. (I did 4 layer buttons instead of 5.) I adhered the flowers together and then used my paper-piercing tool to poke the holes. I topped it all with a coat of Crystal Effects--being careful to not fill the holes. While I let that dry, I worked on the rest of the card. The sentiment comes from the set All Holidays. The stamp actually says "My dear kind & wonderful friend" so I used my Rich Razzleberry marker on the "wonderful friend" part since that was all I wanted. Finished card size is 3 3/4" by 5 1/2".
Stamps: All Holidays
Ink: Rich Razzleberry marker
Paper: Rich Razzleberry, Whisper White
Accessories: 1/2'" Rich Razzleberry Polka-Dot ribbon, Boho Blossoms punch, paper-piercing tool, Crystal Effects, Linen Thread, glue dots, dimensionals
The second card I made uses the set Pumpkin Patch from the Mini Catalog. Instead of using linen thread to tie through the button (like I usually do!) I used my Tabletop Cutter to cut a very thin strip of Old Olive card stock. I carefully pulled it through the button, tied it once and then curled it a bit. I wanted it to look like those curly things on the top of the pumpkin. Anyone know if there is a name for those things?? Anyway, once I had the card together, I added Crystal Effects to the pumpkins too--with the button so nice and shiny, the pumpkins looked a little bare. :-) Finished card size is 3 3/4" by 5 1/2".
Stamps: Pumpkin Patch
Ink: Pumpkin Pie, Old Olive, Chocolate Chip
Paper: Old Olive, Whisper White, Pumpkin Pie
Accessories: paper-piercing tool, 1/2" circle punch, Crystal Effects, 5/8" chocolate chip grosgrain ribbon, glue dots, dimensionals

Saturday, August 15, 2009

Top Note Bag Tutorial


As promised--a tutorial for the Top Note Bag! You can see the original bag that won Stampin Up's July Art Contest (Flutter by Butterfly) HERE. I had quite a bit of fun making another bag. :-)
Begin by cutting 8 Top Note Dies. (I used Kraft paper here.) These will become the front and back panels of the bag. Next you will need to cut 4 partial Top Note Dies that become the sides of the bag. To do this, Take a sticky note and place it directly on the Die to mark your place. I placed mine approximately 1 1/2" away from the side tip/edge of the Top Note. The exact measurement isn't important as much as the consistency. If you would like a wider bag, just place the sticky note further away from the edge.

Line up your folded card stock with the edge of the sticky note. I used a piece of (approx) 3 1/2" by 4" Kraft paper (scored down the middle). Run the Top Note Die through the Big Shot to make the first side piece. Repeat 3 more times making sure to the keep the sticky note in the same place so that all of your side pieces are the same width.
So after you've cut 8 full Top Notes and 4 partial Top Notes, stamp or embellish as desired. Here I ran the Top Notes through the Big Shot again with the Perfect Details Texturz Plate, sponged with Soft Suede Ink, and used my Soft Suede marker around the edges to finish the stitching on the Top Note.

Next score along the edges of the Top Notes. Again the exact measurement is not as important as the consistency of the scoring measurements. I lined up the 'valley' of the Top Notes with the black border of my scorer and then scored.

Score along all four sides of 4 of the full Top Note dies, and 2 of the partial Top Note Dies. On the other 4 full Top Note dies, score along both short edges and only 1 of the long edges. On the other two partial Top Note dies, score along both of the long sides and only 1 of the short sides.

Cut out the little 'square' sections wherever there is an intersection of scored lines. (4 per bottom Top Note and 2 per top Top Note.)

Adhere the Top Notes together as shown in the pictures below using a strong adhesive. I used Tombow Mono Multi (remember a little goes a long way).
Now you have the main part of the bag together! To make the bottom of the bag, place it on a piece of card stock (here I used Soft Suede) and trace along the bottom. You'll have to push down lightly with one hand and trace with the other. Another note, I didn't force the bag to a perfectly rectangular shape, I let it bow out a bit on either side to give it a more natural shape.

Cut out your pattern and adhere to the bottom of the bag. Trim if necessary.

Depending on what you want to use the bag for, you may want to add supports to the bottom and/or sides of the bag. If the bag is just to look pretty :-) you may not need any supports. Here I used 4--2" by 1" pieces of paper scored down the middle for supports. After you've added as many supports as desired, prepare your handles. Here I used approximately 11" of Twill Tape (3/4") with 1/2" Soft Suede Polka-Dot Grosgrain ribbon adhered (with Sticky Strip) on top.
Adhere your handles. If you are going to use brads, grommets, etc add those now. After you adhere the handles, start adding the inside of the bag.

Each bag may be a little different (depending on how you scored), but for the insides of this bag I used two 8" by 5 3/4" pieces of Soft Suede card stock and two pieces of 2 1/4" by 5 3/4" card stock. To make the bottom piece, I turned the bag upside down and traced the pattern. I cut that out and then trimmed down as necessary until it fit in the bottom of the bag.

Now embellish as desired! Here I used the Circle Scallop Punch, Boho Blossoms Punch, Antique Brass Build-A-Brad, and Antique Brass brads.


Finished!
Stamps: Trendy Trees (for dots on Build-A-Brad)
Ink: Soft Suede ink and marker
Paper: Kraft, Soft Suede, So Saffron, Very Vanilla
Accessories: Top Note Bigz Die, Big Shot, Perfect Details Texturz Plate, Scallop Circle Punch, Boho Blossoms Punch, Antique Brass Build-A-Brad, Antique Brass brads, sponge, dimensionals