Showing posts with label Heat Embossing. Show all posts

Tuesday, June 26, 2012

Gratitude Blossoms


Well I think it's been a whole two weeks since I've posted a card using the set Betsy's Blossoms, so I guess it's about time for another one.  :-)  To be honest I'm actually surprised how much I've used this stamp set, but it is really easy to use!  It was an option on the new catalog pre-order, and I only decided at the last minute to add it to my order.  I also used another new (to me) stamp set called Curly Cute for the sentiment and the new In Color Raspberry Ripple. 

The sentiment was stamped with Versamark and then heat embossed with White embossing powder.  I hand-cut the banner and then added the Paper Daisy (smallest size) and pearl.  I randomly stamped the two different flower images on a piece of Whisper White card stock and added a strip of Raspberry Ripple that had been punched with the Scallop Edge Border punch.  I used my Raspberry Ripple marker to edge all of the white card stock. 

Pretty simple!  I haven't gotten to it yet, but I thought this would be a good design to make in sets, (ie for teach gifts) varying the colors and sentiments.  

Thanks for stopping by! 

Stamps:  Betsy's Blossoms, Curly Cute
Ink:  Versamark, Raspberry Ripple and marker
Paper:  Raspberry Ripple and Whisper White
Accessories:  Paper Daisy, pearl, heat tool, embossing buddy, white stampin' emboss powder, scallop edge border punch, dimensionals

Tuesday, June 19, 2012

Mixed Daisies


Hi all!  Today I have another card to share that we made at our April club meeting.  This card uses the Mixed Bunch stamp set.  This was my favorite stamp set from the Occasions Mini Catalog, and I was happy to see it made it into the main catalog this year. 

The layout for this card came from Sara over at Lily's Ink Pad.  I couldn't find her card on her blog, but it was a swap that she gave me at the Stampin Up Regional event in San Antonio earlier this year.  She was so sweet that she gave me a swap even though I didn't have one to give her in return!  Her card used the Mouthwatering stamp set and a similar color scheme. 

I started by stamping the flower image three times with Versamark and heat embossing with White powder.  I added sparkle to the center of the flowers with Dazzling Details.  The leaves are from the Bird Builder punch, and the very small So Saffron scallop border is from the Dotted Scallop Ribbon Border Punch. 

The edge on the Baja Breeze layer was done by running it through the Big Shot twice, first to cut with the Adorning Accents Edgelits Die, and then to emboss with the coordinating Adorning Accents Textured Impressions Embossing Folders.  The polka-dot texture on the Whisper White layer was also done in the Big Shot--with the Perfect Polka Dots Embossing Folder. 

Nothing particularly difficult about this card, just lots of little pieces to get ready and put together.  Hope you liked it! 

Stamps:  Mixed Bunch, Teeny Tiny Wishes
Ink:  Versamark, Wild Wasabi
Paper:  Crumb Cake, Baja Breeze, So Saffron, Wild Wasabi, Whisper White
Accessories:  Blossom punch, Bird Builder punch, Dotted Scallop Ribbon Border punch, Word Window punch, Modern Label punch, heat tool, Embossing Buddy, White Stampin' Emboss Powder, Big Shot, Adorning Accents Edgelits Die, Adorning Accents Textured Impressions Embossing Folders, Perfect Polka Dots Embossing Folder, pearls, Dazzling Details, dimensionals

Tuesday, April 10, 2012

Captain America Birthday


This year I made a goal to send birthday cards to all of our family members.  Grandparents, parents, siblings, and nieces and nephews.  I'm happy to say that so far I'm still on track!  A few of the cards have been a little late :-) but I don't think I've missed anyone yet.  During a year this adds up to just over 40 people, or about 3 or 4 cards per month.  Not really too much to ask a 'card maker' to do when it comes down to it! 

I'm not necessarily sending a unique card to each person, but I am trying to get a good variety and at the very least not send the same card to two people in the same immediate family.  :-)  The hardest cards to design are the ones that are for the brothers and brother-in-laws.  Fortunately this year my husband came up with a great idea!  I showed him THIS card and asked what he thought.  "Sure, but can you change the colors to make it look more like Captain America?"  (He and his brothers are all huge comic book fans--even before the recent Hollywood revival.)  So I asked him to show me a picture of what the Captain America shield looks like and created then the card as closely to that as possible.  Hopefully the guys will notice and appreciate!  :-)

The Pacific Point (blue) layer and the Whisper White circle are up on dimensionals.  The larger Real Red circle is actually the card base showing through the 'window' on the Pacific Point layer.  The sentiment was stamped with Versamark and then heat embossed with White embossing powder.  I distressed the edges of the Pacific Point layer using my Cutter Kit. 

Have a great day!

Stamps:  All Holidays (discontinued)
Ink:  Versamark
Paper:  Pacific Point, Real Red, Whisper White
Accessories:  1" Circle Punch, 1 3/8" Circle Punch, 2 1/2" Circle Punch, Star Punch (random from my kids' collection), Big Shot, Circles #2 Die (for the white circle--2nd largest circle on the die), embossing buddy, heat tool, White Stampin' Emboss Powder, Cutter Kit, dimensionals

Friday, March 30, 2012

Last Minute Sale-A-Bration

Just popping in today with a couple more cards made using Sale-A-Bration products.  And just a last minute reminder that if you've still been meaning to take advantage of Sale-A-Bration, now is the time since it ends tomorrow--Saturday the 31st. With each $50 purchase you can choose an item from the Sale-A-Bration Catalog for FREE! 

The first card today uses the Fresh Vintage stamp set.  Although there were some fantastic options this year in the Sale-A-Bration catalog, I think this was my favorite. 


The idea for this card came from Sharon Field.  If you are a demonstrator, you can see her card HERE on Stampin' Connection.  I changed the color and that was about it!  I picked Calypso Coral since I wanted to use the ribbon from the Everyday Enrichment Pack.  I've used almost two sets of the brads, but sadly have barely touched the ribbon.   A very simple card that I'm sure I'll be making some more of soon! 

Stamps:  Fresh Vintage (only available during SAB), Curly Cute
Ink:  Calypso Coral
Paper:  Whisper White
Accessories:  Calypso Coral organdy ribbon (only available during SAB), Whisper White taffeta ribbon (under the other ribbon), dimensionals

The second card is super simple and uses the Outlined Occasions stamp set.  I did heat emboss the sentiment, and then used my Versamarker to color it in.  It makes the sentiment pop just a little more (especially in real life).  The Designer Series Paper is actually the Twitterpated set from the Occasions Mini Catalog--with a thin strip of Riding Hood Red card stock on top.  


Stamps:  Outlined Occasions
Ink:  Versmark and Versamarker
Paper:  Basic Gray, Riding Hood Red, Twitterpated DSP
Accessories:  Embossing Buddy, White Stampin' Emboss Powder, Heat tool, White Baker's Twine

Two last notes: 

I am hosting a Open House and Rubber Rummage Sale tomorrow!  If you are in Houston (Clear Lake area) and would like more info, send me an email as I'd love to have you come. 

And, some fantastic news. . . The Stampin' Celebration Blog is getting started again!!  Come April 1st we will be back with monthly challenges and a new format.  So check back soon.  :-) 

Thursday, January 19, 2012

Vintage Doilies


Normally I wouldn't consider myself a 'doily person', but I do love the Delicate Doilies set in the catalog.  I've had have fun playing with the set, and this is a vintage-ish card I came up with a while ago:  


This card uses the emboss-resist technique.  I stamped the doily image with Versamark ink onto Very Vanilla card stock.  Next I heat embossed with Clear Stampin' Emboss Powder and then sponged over the top with Soft Suede ink.  I sponged more in the middle (darker) and then faded out to the edges.  The embossed part 'resists' the ink and stays Very Vanilla in color.  A simple 'wow' technique!  

The middle of the doily has one of the Antique Brads.  On the larger Very Vanilla panel, I used my Color Spritzer Tool to add a little texture and then sponged and distressed the edges.  The ribbon is the Victoria Crochet Trim.  

For the tag, I used the Tiny Tags stamp set, Soft Suede ink and the Jewelry Tag punch.  I attached it to the ribbon using a bit of Linen Thread and one of the safety pins from the Vintage Trinkets embellishment set.  A close up of that:  


Thanks for stopping by!  

Stamps:  Delicate Doilies, Tiny Tags
Ink:  Soft Suede, Versamark
Paper:  Very Vanilla, Soft Suede
Accessories:  Clear Stampin' Emboss Powder, Heat Tool, Embossing Buddy, Jewelry Tag Punch, Vintage Trinkets, Victoria Crochet Trim, Antique Brads, Linen Thread, Cutter Kit, Color Spritzer Tool (and Soft Suede marker) sponge, dimensionals
 

Thursday, March 17, 2011

Stampin' Celebration #44


Happy St. Patrick's Day!  I hope you are wearing some green.  :-)  Look at this pretty Stampin' Celebration inspiration piece!  There were a few different ideas that I had initially, but I finally went with the top right photo as my inspiration.  For some reason, it reminded me of the single stamp--Elizabeth.  It's a stamp I earned for free during Sale-A-Bration this year, but I hadn't used it yet. 


I inked up the Elizabeth stamp with Chocolate Chip craft ink and stamped on Naturals White card stock.  Then I heat embossed the image with Clear Stampin' Emboss Powder.  Next I used my blender pen to color the image with Old Olive and Blushing Bride ink.  I also wanted to incorporate a little gold (like in the inspiration photo) so I took a tooth pick and added some highlights with a little Champagne Mist Shimmer Paint.  

Here's a close up.  If you look very closely, you may see a hint of the Shimmer Paint--it's fairly subtle even in real life.  


I also had to use my new-to-me Eyelet Border Punch (yes it really has taken me this long to purchase it!)  After I punched the Naturals White card stock, I sponged the edges with Chocolate Chip ink and folded it back and forth to give a little bit more of a lace effect.  I also sponged and distressed the right edge of the Naturals White layer, and tucked a small strip of Blushing Bride card stock under. 

Thanks so much for visiting today!  Make sure to head over to Stampin' Celebration to take a peek.  You can see who the Party Guest designer is this week, as well as the new inspiration piece and Design Team samples.  And please make sure to play along!  We love seeing what you create! 

Stamps:  Elizabeth, Teeny Tiny Wishes
Ink:  Chocolate Chip craft ink, Old Olive, Blushing Bride
Paper:  Chocolate Chip, Blushing Bride, Naturals White
Accessories:  Blender Pen, Champagne Mist Shimmer Paint, Old Olive Satin Ribbon, Heat Tool, Clear Stampin' Emboss Powder, Embossing Buddy, Eyelet Border punch, sponge, cutter kit, dimensionals

Thursday, February 17, 2011

Stampin' Celebration #40


I just love seeing all of the inspiration pieces week after week!  Now I don't usually love yellow, but the warm sunny feel of these pictures is great!  This week I took the inspiration piece quite literally:  


I loved the picture of the wedding cake, so I went to work recreating it with paper.  I pulled out my well-loved Baroque Motifs stamp set, and some of the new Daffodil Delight Pompom Trim from the Occasions Mini Catalog.  After I stamped with Daffodil Delight and stacked the cake, I added a few flowers with my punch from the Itty Bitty Shapes Punch Pack.  And of course some Rhinestone pearls provide a great finishing touch and some bling.  

The sentiment is from the set Teeny Tiny Wishes and was stamped with Versamark and heat embossed with White Stampin' Powder on Vellum card stock.  (Hint: If you are heat embossing, I would suggest using the Vellum card stock as opposed to the Vellum Paper as it holds up better under the heat.)   

Thanks for stopping by!  Make sure to head over to Stampin' Celebration to see what the other Design Team Members have created this week!  And, note that there has been a change to the "Pick of the Party"--there will only be one per week, but the winner will be invited to be a guest designer for the following week's challenge!  So link your submissions for a chance to be a guest designer!  You can read more details on the Stampin' Celebration blog.  

Stamps:  Baroque Motifs, Teeny Tiny Wishes
Ink:  Daffodil Delight, Versmark
Paper:  Daffodil Delight, Whisper White, Vellum Card Stock
Accessories:  Daffodil Delight Pompom Trim, Itty Bitty Punch Pack, Rhinestone Pearls, Corner Rounder Punch, Embossing Buddy, White Stampin' Emboss Powder, Heat Tool

Thursday, February 10, 2011

Stampin' Celebration #39


It's a good thing I have the Stampin' Celebration challenge to keep my blog going. :-) Another great inspiration piece this week! Pink, brown, and Valentine's Day! 


This week I used the inspiration piece to create some little valentines that my 3 year old daughter could take to her preschool class.  She was excited about the pink, and her only other request was 'sparkles'.  I also pulled some inspiration from  a one-layer swap card that I received from my sweet friend Donna a few years ago at Leadership. 

I used the stamp set I {Heart} Hearts.  I stamped the dotted heart with Early Espresso, and the smaller heart with Pretty in Pink (the specific color isn't actually important).  After I stamped the little heart, I used my Tombow Multipurpose Liquid Glue and went over the little heart.  Then I poured Pink Stampin' Glitter (from the Fine Supernova collection) over the top.  The Liquid Glue held the glitter really well and dried quickly.  

The sentiment is from the set Teeny Tiny Wishes and stamped with Versamark and heat embossed with White Stampin' Emboss Powder. 


These are really very simple to make little matchbook treat holder.  I used a piece of 8 1/2" by 3" piece of Soft Suede--getting 3 per sheet of 8 1/2" by 11".  I scored one end at 3/4", then flipped it around and scored from the other end at 4 3/4".  Of course depending on the type of treat you put inside, you may need to alter those measurements.  The staple also helps hold the treat in place.  

Thanks so much for stopping by!  Make sure to head over to Stampin' Celebration to see the other designs for the this week.  Then make sure to play along as we celebrate life's special moments!  

Stamps:  I {Heart} Hearts, Teeny Tiny Wishes
Ink:  Early Espresso, Pretty in Pink, Soft Suede and Pretty in Pink markers, Versamark
Paper:  Soft Suede, Whisper White
Accessories:  Pretty in Pink taffeta ribbon, Fine Supernova Stampin' Glitter, Heat Tool, White Stampin' Emboss Powder, stapler, candy

Wednesday, October 6, 2010

WICKEDly Halloween--ish


I'm back to share the last project I created for the October WICKED challenges over at Splitcoaststampers.  If you missed the details of what this is about see HERE. 

This challenge called Halloween-ish is to take one or more of the ‘traditional’ Halloween colors (orange, black, gray, purple, green) and use them on a NON-Halloween project.  So I picked the colors Rich Razzleberry and Old Olive as my 'Halloween' colors.  

The main image, from the set Awash with Flowers, is stamped on the oval that comes from the center of the Frame, Scallop Oval Bigz Die. The line art is stamped with Basic Black craft ink and heat embossed with Clear Embossing Powder. Then I spritzed the paper with water and stamped the Rich Razzleberry solid image (stamped off twice first). 

After I sponged and distressed the edges, I spritzed with Smooch Spritz to give a subtle shimmer.  The card base is stamped with Versamark and the Sanded Background stamp.  I also used the Dotted Scallop Ribbon Border punch and Old Olive taffeta ribbon.  

I'd love to see your take on this or any of the other challenges!  If you are a demonstrator registered with SCS, check out THIS thread for details and where to upload.  If you're not a demonstrator, send me a picture or leave a link with your project in a comment and I'll come check it out!  

Stamps:  Awash with Flowers, Tiny Tags, Sanded BG
Ink:  Old Olive, Rich Razzleberry, Baisc Black Craft, Versamark
Paper:  Crumb Cake, Rich Razzleberry, Naturals White
Accessories:  Old Olive 3/8" Taffeta Ribbon, Vanilla Shimmer Smooch Spritz, Dotted Scallop Ribbon Border punch, Jewelry Tag Medium punch, Heat Tool, Embossing Buddy, Clear EP, Big Shot, Frame Scallop Oval Bigz die, linen thread, cutter kit, sponge, dimensionals

Thursday, September 30, 2010

Stampin' Celebration #22


Look at this fun inspiration piece from Stampin' Celebration!  I had fun using it as my inspiration to create this card:


For some reason I wasn't feeling the bee theme, so I went with the bottom left photo as my inspiration.  I used my Flower, Daisies #2 Big Shot die for the flower (two layered on top of each other).  For the center of the flower I started with a 1/2" circle punched from Early Espresso and then daubed it with Champagne Mist Shimmer Paint.  Next I added a layer of Crystal Effects.  I know the picture doesn't capture the amazing shimmer of it, so you'll just have to try it for yourself!  

I sponged just the tips of the daisies, as well as around the Daffodil Delight layer and the Crumb Cake card base with Early Espresso ink.  I added the Hemp Twine around the Daffodil Delight layer to add a little more interest, and then stamped the sentiment (from the set Just Believe) with Versamark and heat embossed with White Stampin' Emboss Powder.  

And there you have it!  Make sure to head over to Stampin' Celebration to see what the other members of the Design Team have been up to this week. 

Stamps:  Just Believe
Ink:  Versamark, Early Espresso
Paper:  Crumb Cake, Daffodil Delight, Early Espresso, Whisper White
Accessories:  Champagne Mist Shimmer Paint, Crystal Effects, Hemp Twine, Daisies #2 die, Big Shot, 1/2" Circle punch, White Stampin' Emboss Powder, Heat Tool, Embossing Buddy, dimensionals

Tuesday, September 7, 2010

Paisley Wedding


I have another card to show you that uses the Paisley Prints stamp set that is from the Holiday Mini Catalog.  I just love how versatility of this stamp set!  I love that this could be a wedding, anniversary, or even Valentine's Day card. 

I started by running a piece of vellum card stock through the Big Shot with the Perfect Details texturz plate.  Then I added the sentiment--from the set Fabulous Phrases.   I stamped the sentiment and the hearts with Versamark ink and heat embossing with Silver Stampin' Emboss Powder. 

To finish the card I added the Whisper White Organza Ribbon and the Clear Rhinstone Brads.  The finished card size is 3" by 6". 

Stamps:  Paisley Prints, Fabulous Phrases
Ink:  Versamark
Paper:  Blushing Bride, Whisper White, Card Stock Vellum
Accessories:  Perfect Details Texturz Plate, Big Shot, Silver Stampin' Emboss Powder, Heat Tool, Embossing Buddy, Whisper White Organza Ribbon, Clear Rhinestone Brads, dimensionals

Wednesday, July 28, 2010

Just Friends


Ready for another card with the set Just Believe? This is another card that was on the Display Boards at convention. :-) The color scheme for this card came right from the Always Artichoke page of the new Color Coach. I used the 'sweet set' Always Artichoke, So Saffron, and Cajun Craze along with the 'dynamic duo' River Rock and Always Artichoke. As I was making these samples for the boards, I was so glad that I had the Color Coach! Especially since I was using new colors that I wasn't familiar with, it made creating color combinations SO much easier.

Anyway, this is actually a fairly simple card. I started by stamping the card base with the Sanded Background stamp and Versamark ink. I tore the edge of the Cajun Craze layer and then added the paper piercing. For the main image and the sentiment I stamped with versamark ink and heat embossed with White Stampin' Emboss powder. I used the Cutter Kit to distress the edges of the Always Artichoke layer and curled the one corner a bit. It's hard to tell from the picture, but I used the Faux Suede technique on the So Saffron layer.

If you aren't familiar with the Faux Suede technique, it is actually fairly simple. Take your strip of paper and a bone folder. Use the bone folder to pull it along the paper as if you are curling ribbon. Make sure the 'curl' the paper every which way so that you can break down the fibers in the paper. Next start at a corner of the paper and carefully peel the paper apart into two halves lengthwise--as if you are peeling a sticker from the backing. The 'faux suede' is actually just the inside of the paper. You'll have to try it to see how simple it really is! I love this technique because it easily adds (soft) texture to your project.

To see two more samples using the faux suede technigue, click HERE.

Thanks for stopping by--hope you've enjoyed!

Stamps: Just Believe, Sanded BG
Ink: Versamark
Paper: River Rock, Always Artichoke, Cajun Craze, So Saffron
Accessories: Paper Piercing Tool, Mat Pack, Linen Thread, White Stampin' EP, Heat Tool, Embossing Buddy, Cutter Kit, dimensionals

Monday, July 26, 2010

Simple Believe

Yay! I can finally start sharing with you all the projects that I made for the Display Boards at convention! One of the sets I worked with is Just Believe. What a pretty stamp set! After I finished creating all my samples, I think this simple card ended up being among my favorites.

I think I may have mentioned previously that the combination of Marina Mist and Daffodil Delight is one of my new favorites. Somehow it seems to be calming and energizing at the same time.

For this card all I did was stamp the images, punch them out with my 1 1/4" circle punch, and then add the Linen Thread between the circles. The image was stamped with Versamark Ink and embossed with White Stampin' Emboss Powder. How simple is that?


Thanks for stopping by! Check back later for more Display Board samples. :-)

Stamps: Just Believe
Ink: Marina Mist, Daffodil Delight, Versamark
Paper: Crumb Cake, Whisper White
Accessories: Paper Piercing Tool, Linen Thread, Heat Tool, Embossing Buddy, White Stampin' Emboss Powder, 1 1/4" Circle Punch, dimensionals

Wednesday, July 21, 2010

Artisitc Friend

Although the stamp set Artistic Etchings didn't immediately catch my eye as a set that would be 'my style', I'm glad that I decided to get it. It is an easy stamp set to work with, and creates beautiful images. The above card is another one that we made for club this month, and the idea came from HERE. My friend Cindy sent me the link to that cute card, and then I essentially created the same card with Stampin Up supplies.

I stamped the image with Very Vanilla craft ink on Crumb Cake card stock. After I let the ink dry completely, I stamped the sentiment from the new set Fabulous Phrases with Jet Black StazOn ink. To the center of the image I added a small circle of Pear Pizzazz (Itty Bitty Shapes Punch Pack) and one of the new Basic Pearls. The gorgeous ribbon is the new Victoria 5/8" Crochet Trim ribbon.

Finished card size is 3 1/2" by 5".

For convention, one of the organized swaps I am participating in is "All About the Details". I thought the card we made for club was a good start, so I added a couple more details. I added the black layer and some embossing on the base layer. If you look closely, you can see the base was stamped with versamark ink and then heat embossed with Clear Stampin' Emboss Powder. Hopefully the ladies I am swapping with (today) will like it! The card is the standard 4 1/4" by 5 1/2" size.

Stamps: Artistic Etchings, Fabulous Phrases
Ink: Very Vanilla Craft, Jet Black StazOn, Versamark
Paper: Pear Pizzazz, Very Vanilla, Crumb Cake
Accessories: Victoria Crochet Trim ribbon, Basic Pearls, Itty Bitty Shapes Punch Pack, Corner Rounder Punch, Heat Tool, Clear Stampin' Emboss Powder, Embossing Buddy, dimensionals

Thursday, July 8, 2010

Stampin Celebration #10


What a great inspiration piece this week over at Stampin' Celebration! I think this may be one of my favorites to date! And how perfect that we are celebrating weddings. I decided to double-dip this week and not only create something for the challenge, but also design my sister's bridal shower invitations at the same time.

I chose Basic Black and Barely Banana for this week. I will use this same layout and design for my sister's invites, just change all of the black to Certainly Celery. This invitation is 3 3/4" by 8" and fits perfectly inside a standard size business type envelope. Part of the reason that chose this size invite is that I will be able to make all of them using scraps left over from the invitations. I will barely do any cutting (saving lots of time) and also not let all those paper scraps go to waste.

For the texture, I used the new Vintage Wallpaper Textured Embossing Folder. After I textured, I also sprayed with Vanilla Smooch Spritz giving it a nice shimmer.

I also wanted to make up some simple thank you notes that my sister can use after the shower. I took the design of the invitation and simplified a bit. The sentiment is from the new hostess set Because I Care, and is stamped with Basic Black Craft Ink and embossed with Clear Stampin' Emboss Powder. The finished card size is 3 1/2" by 5" and again I'm just using the paper scraps from the invites. And of course I'll also change the black to Certainly Celery to match her wedding colors.

Thanks for stopping by! Make sure to head over to Stampin' Celebration to see what the other members of the Design Team have created using this same inspiration piece. And while you are there, check out the Top 3 from last weeks challenge.

Stamps: Because I Care
Ink: Basic Black Craft Ink
Paper: Barely Banana (now discontinued), Basic Black, Whisper White
Accessories: Vintage Wallpaper EF, Big Shot, Basic Black Satin Ribbon, Basic Black 1/4" grosgrain ribbon, Heat Tool, Clear EP, dimensionals

Monday, June 14, 2010

Happy Heart Treat Pull

Today I have another project to show you that I actually made quite a while ago, but for some reason never posted on my blog! This is a project that I submitted to Stampin' Up for one of their monthly Art Contests that they have for demonstrators. While I didn't win the contest for that month, I did receive an Honorable Mention for this project. Yay!

So, the idea for this project came from the concept of a slider card. If you've ever made one, you know how fun it can be to have a little surprise pop up! I combined the concept of a double slider card with the idea to have some treats pop up, and this is what I created. When you pull on the ribbons, up comes the candy, and down comes a message. :-)


The little tag on the top allows you to get to the candy with out needing to tear the card stock. The candy is inside one of the Sweet Treat Cups. (You'll see these again in the new catalog!)

The stamp set I used is A Happy Heart--another set that is being discontinued after June 30th. I stamped the heart image with Versamark, embossed with Heat & Stick Powder, and then embossed again with Fine Galaxy Stampin' Glitter.

To create the faux charm, I punched out the little heart from the Heart to Heart punch, and then embossed several times with the Silver Stampin' Emboss Powder. I used the Scallop Edge Punch for the border along the Chocolate Chip layer. See a tutorial HERE that shows what size paper you'll want to start with to end up with perfectly rounded corners.

Thanks so much for stopping by! Have a great week!

Stamps: A Happy Heart
Paper: Real Red, Chocolate Chip, Whisper White
Ink: Versamark, Real Red
Accessories: Sweet Treat Cup, Chocolate Chip and Whisper White Taffeta Ribbon, Real Red Grosgrain Ribbon, Linen Thread, silver brad, Corner Rounder Punch, Heart to Heart Punch, Scallop Edge Punch, Tag Punch, Heat Tool, Embossing Buddy, Heat & Stick Powder, Fine Galaxy Glitter, dimensioanls

Thursday, June 3, 2010

Stampin' Celebration #5


It's already time for another Stampin' Celebration challenge! I loved the colors in the inspiration piece, and I decided to keep with the graduation theme. The colors I picked to use are Soft Suede and Bermuda Bay (an In Color that will be discontinued soon).

To create my pennants, I used the birthday hats stamp from the set Party Hearty. This is an idea I've seen before, although I'm not sure exactly where. I used my Versamarker to ink just the triangles of the hats, and then embossed with Clear Stampin' Emboss Powder. The individual pennants are attached to the Linen Thread, and then up on dimensionals.

The sentiment is from the stamp set Teeny Tiny Wishes. The card is held closed with Hemp Twine. Finished card size is 4" by 4".

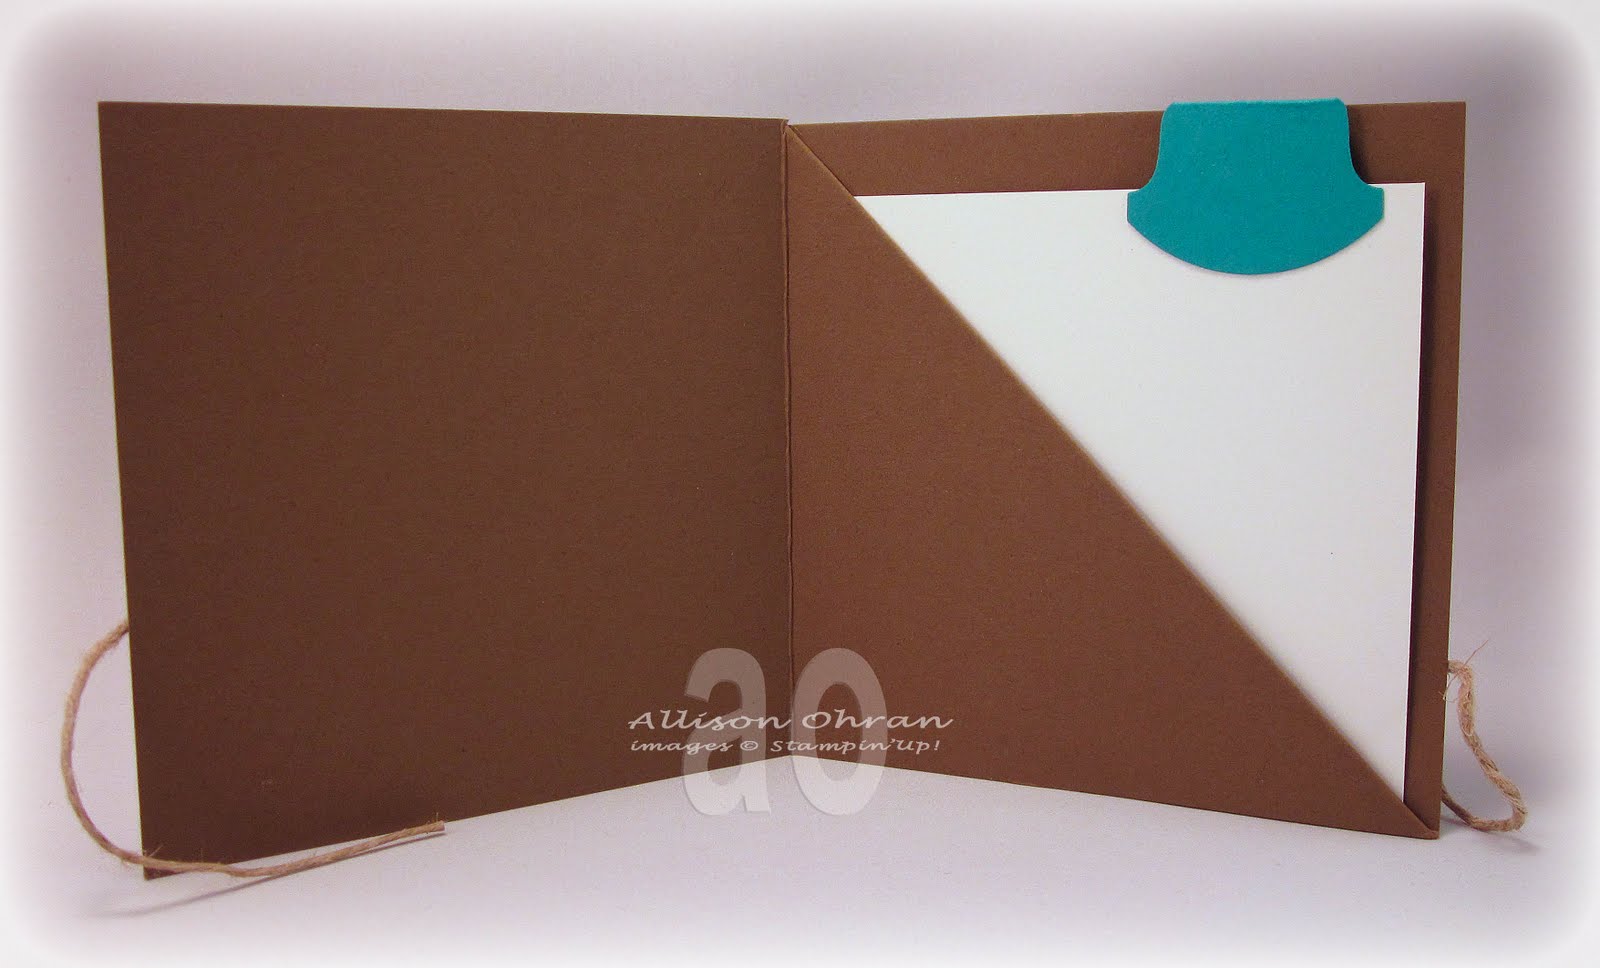
When you open the card, there is a pocket where you can easily add cash or a gift card along with a note. To see how I folded this card, see the second half of THIS tutorial.

Thanks so much for stopping by! Make sure you visit Stampin' Celebration to see what the other members of the Design Team created using this same inspiration piece. We'd also love to have to join us!

Stamps: Party Hearty, Teeny Tiny Wishes
Paper: Soft Suede, Bermuda Bay, Whisper White
Ink: Soft Suede, Versamarker
Accessories: Round Tab Punch, Clear Stampin' Emboss Powder, Heat Tool, Embossing Buddy, Linen Thread, Hemp Twine, dimensionals

Thursday, April 29, 2010

Swingin' Monkey and Great News!

First I have a fun card, and then some great news! Ever since I learned the trick of ribbon gathering (from Shelli at Convention a few years ago) I've used it here and there on cards. (See another example of ribbon gathering and a tutorial HERE.) A while back it occurred to me that you don't just have pull the ribbon from the center. It was from that realization that this card originated.

Combine the ribbon gathering with this cute monkey from the stamp set Fox & Friends in the Occasions Mini Catalog, and what could be more fun! It took a little while to gather enough ribbon for all the vines, but I think the effort was worth it in the end. :-)

The monkeys and sentiment were stamped with Chocolate Chip Craft Ink and embossed with Clear Embossing Powder. The leaves were punched out using the Extra Large Two-Step Bird Punch. And then lots of dimensionals and pop-up glue dots keep everything together!

Stamps: Fox & Friends, All Holidays
Ink: Chocolate Chip Craft Ink
Paper: Kraft (Crumb Cake), Always Artichoke, Chocolate Chip, Very Vanilla
Accessories: Always Artichoke grosgrain ribbon, Heat Tool, Embossing Buddy, Clear EP, Extra Large Two-Step Bird Punch, pop-up glue dots, dimensionals


And now for the good new! About a week ago, I received an email from Kyrstal (known in the online world as skdeleeuw) asking if I would like to be on a Design Team for a new website called Stampin' Celebration that she and Candace Lawlor were starting. Of course I told her I was honored to be asked! I am so excited for this opportunity to stretch my creativity and to rub shoulders with some very talented stampers.

To see the other members of the Design Team, go visit Stampin' Celebration. And make sure to check back next Thursday, May 6, for the first Inspiration Challenge. You won't want to miss it!

Wednesday, April 21, 2010

A Wonderful Friend


Last week my friend Cindy stopped by to drop off these adorable cards. Aren't they both too cute!! I loved both of them so much that I asked her if I could share them with all of you here on my blog. I honestly can't decide which one I like the best!

Both of these cards use stamp sets that are on sale for 20% off during the month of April. Don't miss your opportunity to get these awesome sets at a discount! To see the flyer click HERE.

The card above uses the stamp set Fifth Avenue Floral. All of the flowers are embossed with Clear Stampin' Emboss Powder. The card also shows off two colors--Cameo Coral and Blush Blossom--that will be discontinued as of June 30th.

This next card show off the stamp set Trendy Tress and more colors that will be discontinued as of June 20th--Sage Shadow, Barely Banana, Close to Cocoa, and Pixie Pink.

I also love how Cindy used the Beautiful Wings Embosslit from the Occasions Mini Catalog to add the butterfly. A perfect finishing touch!

Stamps: Fifth Avenue Floral, Trendy Trees
Ink: Versamark, Sage Shadow, Barely Banana, Close to Cocoa, Pixie Pink
Paper: Sage Shadow, Barely Banana, Close to Cocoa, Pixie Pink, Whisper White, Craft, Blush Blossom, Cameo Coral
Accessories: Whisper White grosgrain ribbon, Scallop Edge Punch, Beautiful Wings Embosslit, Stamp-a-ma-jig, Clear EP, dimensionals

Monday, April 5, 2010

Vogue Butterflies

When I first looked through the Occasions Mini Catalog, the stamp set Vintage Vogue didn't immediately catch my eye. But, I received the set for free when I attended the Phoenix Regional in January, so I've had the opportunity to use it. Now I think it is one of my favorite sets from the Mini Catalog!

For this card I started by using the single stamp Butterfly Accent. I stamped with Pretty in Pink on Whisper White and then cut out the butterfly. After I had finished cutting, I had the thought that perhaps the Beautiful Butterflies Bigz Die (Big Shot) may have a coordinating butterfly. I checked and sure enough--almost an exact match. So, for the vellum layer I went the easy route and used my Big Shot to do all the cutting work. :-)

To dress up the vellum butterflies, I stamped with Versamark ink and embossed with Iridescent Ice Stampin' Emboss Powder. I layered the two butterflies together and then wrapped the Linen Thread around. I also used Iridescent Ice around the edge of the card--I just used my Versamark pad to dab around the edges and then embossed. So lots of sparkle going on in this card! :-) The friend sentiment (also embossed with the Iridescent Ice) is also from the Vintage Vogue set--I just omitted the 's' from the friends stamp.


Stamps: Vintage Vogue, Butterfly Accent
Ink: Pretty in Pink craft ink, Versamark
Paper: Pretty in Pink, Vellum Card stock, Whisper White
Accessories: Iridescent Ice EP, Heat Tool, Embossing Buddy, Pretty in Pink Satin Ribbon, Linen Thread, Beautiful Butterflies Bigz Die, Big Shot, dimensionals