Showing posts with label Taffeta Ribbon. Show all posts

Friday, June 15, 2012

Butterfly Clips


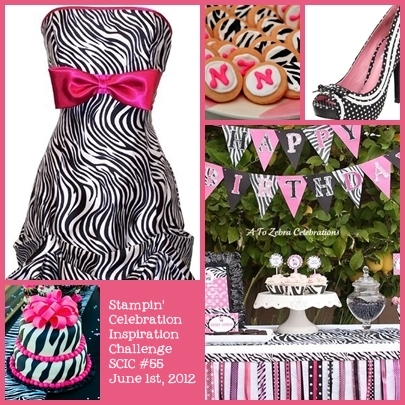
It's time for your mid-month reminder to play along with us at Stampin' Celebration!  With such a fun inspiration piece this month, it should be easy!

A little bit ago I saw these cute butterfly clips over on Pinterest and knew that I wanted to try some of my own.  My 4 year old daughter is WAY into being 'pretty', and she loves cute clips to put in her hair.  She was so excited that I was making these for her that I was barely able to finish and get a picture of them before she snatched them up and ran off.  :-) 
Making the first clip took a little figuring out, but then the second was easy once I got the hang of it.  The approximate lengths of the ribbons that I started with:  

Basic Black Scallop Dots Ribbon:  2"
White White Taffeta Ribbon:  2 5/8"
Melon Mambo Scallop Dots Ribbon:  3 1/4"

I just used a low-melt glue gun to put it all together.  Start by adding ribbon directly to the clip (here Old Olive taffeta).  Next create the smallest circle by gluing the ends together.  Then I glued one end of the white ribbon to the black, looped it around and glued the other side so both circles are stuck together.  Then I repeated that with the pink ribbon.  Make the second set of 3 circles, and then glue them both to the clip. 

For the antennae (since I didn't have any thin pipe cleaner on hand and didn't want to run to the store) I used Baker's Twine coated with a little Crystal Effects.  I just let it dry well, and then was able to shape it into the little antennae.  I didn't get the Crystal Effects totally smooth on the Baker's Twine, but that doesn't seem to affect it being able to hold it's shape.  I found it easiest to add the antennae very last. 

Here is a closer look: 

Let me know if you have any questions about these!  They really are fun to make and of course you could use a variety of colors and styles of ribbon.  I'm planning to make up some of these to take with me as 3D swaps for convention, so come find me if you'd like one.  :-) 

And remember to play along with us at Stampin' Celebration! You have until June 25th to create a card, 3D item, digital item, scrapbook layout, etc. using the inspiration piece above. Link your creation to the Stampin' Celebration blog so we can see your project. We will choose the "Pick of the Party" at the end of the month. We can't wait to see what Stampin' Celebration inspires you to create!

If you missed the original Blog Hop of the Design Team, you can see it here: 

Allison Ohran -Sweet Impressions (you are here)
Candace Lawlor - not participating this month
Cori Kozak - Creative Chat
Erica Cerwin - Pink Buckaroo Designs
Erin Gonzales -Hand Stamped Style
Krystal De Leeuw - Krystal's Cards
Marlene Peters - not participating this month
Rochelle Gould - I stamp, I create, I have fun!


Stampin' Celebration Inspiration Challenge

Monday, January 30, 2012

San Antonio Regionals--Part 2

Finally back with some more samples from my presentation at the San Antonio Regionals!  I'll do a Part 3 (and final) later this week.  So, the second part of my presentation was showing that you can use the Multipurpose Adhesive Sheets to add Dazzling Diamonds Glitter to just part of a stamped image.  


So for this card, I started by stamping an image from the new Apothecary Art stamp set.  I ran it through the Big Shot using the new Framelits Labels Collection to cut it out and used my markers to color the flowers.  Next I used my 1" Circle Punch to punch out a circle of the Multipurpose Adhesive Sheet.  I used my bone folder to burnish the edges (making it easier to peel the back off) and peeled off the backing.  I face planted the sticky side of the adhesive sheet on top of the circle part of the stamped image.  I used an Embossing Buddy to help cut down on static, and then peeled off the other side of the backing.  Pour the Dazzling Diamonds Glitter over the top and brush off any excess.  Now part of your stamped image is sparkly.  :-)  

This is a 3" by 3" card.  To create the slits that I ran the ribbon through, I used the cutting blade on my Cutter Kit, and for the Whisper White layer I sponged and distressed the edges and used my Color Spritzer tool and Early Espresso marker to add the random 'dots' of color. 

Stamps:  Apothecary Art
Ink:  Early Espresso, and Riding Hood Red, Old Olive and Early Espresso markers
Paper:  Riding Hood Red, Early Espresso, Whisper White
Accessories:  Riding Hood Red Taffeta Ribbon, Linen Thread, Framelits Labels Collection, Big Shot, Cutter Kit, Pearls, Multipurpose Adhesive Sheets, Dazzling Diamonds, Color Spritzer Tool, sponge, dimensionals


This is another sample I had on my board, although it is a 're-do' of a project I've done before.  It's a little Valentine matchbox treat.  My daughter gave these out to her preschool class last year.  You can see more info, as well as cutting measurements HERE.  Pretty much the only difference was that I used my Small Heart punch to punch out a pieces of the Multipurose Adhesive Sheet to add the Pink Stampin' Glitter (from the Fine Supernova collection)--instead of using the Tombow Multipurpose Liquid Glue.  

This actually points out one of the benefits of the Adhesive Sheets--you don't have to wait for anything to dry!  

Stamps:  I {Heart} Hearts, Teeny Tiny Wishes
Ink:  Early Espresso, Pretty in Pink, Soft Suede and Pretty in Pink markers, Versamark
Paper:  Soft Suede, Whisper White
Accessories:  Pretty in Pink taffeta ribbon, Fine Supernova Stampin' Glitter, Multipurpose Adhesive Sheets, Heat Tool, White Stampin' Emboss Powder, stapler, candy
 
 
And another Valentine 're-do. '  :-)  To see the original of this one, click HERE.  The basic difference here is that instead of using the Multipurpose Adhesive Sheet/Dazzling Diamonds on the hearts, I used it on the Designer Paper.  And I used the Designer Paper instead of fabric.  
 
This Designer Paper actually comes from the Everyday Enchantment Designer Series Paper that is one of the free product options during Sale-A-Bration

Stamps:  Tiny Tags
Ink:  Cherry Cobbler
Paper:  Cherry Cobbler, Very Vanilla, Everyday Enchantment Designer Series Paper
Accessories:  Distressing Essentials Kit, Victoria Crochet Trim ribbon, Antique Brad, Full Heart punch, Heart to Heart punch, Jewelry Tag Medium punch, linen thread, Dazzlig Diamonds, Multipurpose Adhesive Sheets, dimensionals

Thanks for stopping by!  I'll be back again with the last 3 samples I had on my display board. 

Wednesday, June 22, 2011

Merry Tags


Back with another project that is showcasing accessory items that will soon be discontinued!  These are little tags that we made at a class last year before Christmas.  I am pretty sure that I found this (or a similar) idea somewhere, although unfortunately I did not keep track of where or who I received the inspiration from.  

These tags are really simple to make--the tag is the Big Shot Merry Embosslit die.  The embosslit cuts the tag and hole and dry embosses the 'merry' all at once.  The bird, trees, and snowflake all come from the Merry Details Sizzlets die.  Both are being discontinued, and are on sale for 25% off while supplies last or until June 30th. 

I added the 1/8" Taffeta Ribbon to the tops and pearls to the trees and bird and a rhinestone to the snowflake.  Along the sides of the tags are pieces punched using the Scallop Edge Border punch or the Dotted Scallop Ribbon Border punch.  

A simple way to personalize your holiday gifts!  

Paper:  Whisper White, Real Red, Marina Mist, Old Olive
Accessories:  Real Red, Marina Mist, and Old Olive 1/8" Taffeta Ribbon, pearls, rhinestones, Scallop Edge Border Punch, Dotted Scallop Ribbon Border Punch

Monday, May 31, 2010

More Elements of Style

Happy Memorial Day! I hope that everyone has the chance to spend time remembering those they love. Today I have another card to show you using the stamp set Elements of Style. This is a card I made for a swap with my downline, and we also made this as part of our Stampers Clubs this month.

And, a last minute reminder, today is the last day for the May Promotion. When you purchase select sets (including this one) you earn a free package of Designer Brads!

For this card, I started by stamping my main image with Close to Cocoa craft ink. While that dried, I randomly stamped that same image on the card base. I also used my Color Spritzer with a Chocolate Chip marker to add texture to the base. The Blush Blossom layer is spritzed with the new Vanilla Shimmer Smooch Spritz from the Summer Mini Catalog--giving it a very nice shimmer. Note: Both Close to Cocoa and Blush Blossom are being discontinued.

I colored the main image using my Aqua Painter and Certainly Celery, Pretty in Pink, and Blush Blossom. I added Crystal Effects and Dazzling Diamonds to the center of the flowers. To add the ribbon I used my Hobby Blade and cut a slit to pull the ribbon through. The cute ribbon slide is from the Hodgepodge Hardware collection.

Stamps: Elements of Style
Ink: Close to Cocoa Craft Ink, Certainly Celery, Blush Blossom, Pretty in Pink, Close to Cocoa (for sponging), Chocolate Chip marker
Paper: Close to Cocoa, Blush Blossom, Chocolate Chip, Confetti White
Accessories: Vanilla Shimmer Smooch Spritz, Color Spritzer, Dazzling Diamonds, Crystal Effects, Aqua Painter, Cutter Kit, sponge, Chocolate Chip taffeta ribbon, Styled Silver Hodgepodge Hardware, dimensionals

Tuesday, May 18, 2010

Lots of Circles

Today I have two cards to share that both use the stamp set Circle Circus. Not only is this a set I love, it is also a set that happens to be a part of the May Stampin' Up promotion! When you purchase this set during May, you can choose a package of Designer Brads for FREE! See the flyer with all of the details HERE.

I found the inspiration for this card HERE. I loved Ruth's card, and so I didn't make too many changes. I like the way that the front layer of the card is shorter than the back, so that the circles hang off the edge. I used the colors Mellow Moss, Really Rust (both retiring) and Chocolate Chip.

One detail that I added was the Circle Designer Brad to the center of one of the circles. I carefully dipped the brad in my Chocolate Chip Craft pad, then dipped it in Clear Embossing Powder, and then embossed. Hint: The brad gets VERY hot while embossing. I used tweezers to hold the brad so that I didn't burn myself.

To see a slightly different version of how to color your Designer Brads, see THIS tutorial (scroll to the bottom). You'll learn how to get the color into only the depressed part of the brad.

The second card I have to share was inspired by Lauri's card that you can see HERE. My version is a 3x3 card. I used Crystal Effects in the center of the stamped image to add a little dimension and shine. The Kraft layer (square) is up on dimensionals.

Stamps: Circle Circus, Thank You Kindly, Teeny Tiny Wishes
Ink: Mellow Moss, Really Rust, Chocolate Chip
Paper: Mellow Moss, Chocolate Chip, Kraft (Crumb Cake), Whisper White
Accessories: Circle Designer Brad, various circle punches, Scallop Circle Punch, Chocolate Chip taffeta ribbon, Cutter Kit, dimensionals

Thursday, March 19, 2009

Polka Dot Elegance


Today I have another Sale-A-Bration card to show you! Just a reminder that Sale-A-Bration ends March 31, so if you want to take advantage of earning free product with a $50 order, now is the time! You can see the brochure HERE.

Anyway, I don't often copy ideas exactly from other people, but this card was just so pretty that didn't want to change a thing! I first saw this card on the idea boards at the Stampin Up Leadership conference, and later found the creator. Dawn over at DOstamping with Dawn made this card for the leadership boards. You can see her card HERE.

You'll notice that I didn't change very much. The only minor modifications were that I used the new Taste of Textiles paper (the white pin stripe paper on the left) and the new Organza Ribbon on top of the Brushed Silver strip of paper.

Another quick note: I actually used Basic Black craft ink, and then embossed with the Silver Embossing Powder. As long as you work fairly quickly, the silver embossing powder does cover the Basic Black craft ink. I used the black ink because when I was stamping the hearts for the panel along the right side, I started using Versamark ink, and was having a hard time seeing where to stamp! I didn't have that problem with the black ink. :-)


I also made up a coordinating acetate box. This could be used as a wedding favor, bridal shower favor, or as part of a wedding gift. The box shows off how pretty the Organza Ribbon is! For directions on how to make the acetate box, THIS POST (Halloween acetate box) has a link and the modifications I made.

Stamps: Polka Dot Punches, Fundamental Phrases
Ink: Basic Black Craft Ink
Paper: Brushed Silver, Taste of Textiles, Whisper White, acetate
Accessories: Full Heart Punch, Pretties Kit (hat pin and beads), Whisper White taffeta ribbon, Organza Ribbon, embossing buddy, silver Stampin' Emboss powder, heat tool, sticky strip, dimensionals

Wednesday, February 18, 2009

Rose Simplicity


This is a card that I created for an organized swap at leadership. The challenge was to make a one-layer card. Yep, just one piece of card stock. The rules allowed one embellishment, but that was it! Although it sounds simple, the ideas that people came up with in the swap were amazing! Sometimes simple isn't bad. :-)

Anyway, here is my card using the set A Rose is a Rose. This is a two-step stamping set, so it is easy to create the "depth" of the leaves and roses. I used Riding Hood Red and Old Olive ink and stamped on Glossy White card stock. To add the ribbon, I used my Crop-A-Dile to punch two holes, pulled the Riding Hood Red Taffeta ribbon through, and then tied the knot.

Stamps: A Rose is a Rose
Ink: Riding Hood Red, Old Olive
Paper: Glossy White card stock
Accessories: Riding Hood Red Taffeta Ribbon, Crop-A-Dile

Friday, February 13, 2009


Today I have a very quick project to show you. I love this type of project--it gives you a nice handmade gift for someone in literally minutes! This was one of the projects we made at my Valentine's bundle class.

I wrapped the Riding Hood Red card stock around the candle and used Sticky Strip to adhere the paper to itself. (Although you can, I didn't actually adhere the paper TO the candle, just around.) Next I wrapped and adhered the Candy Land Designer Paper.

For the tag, I stamped with Riding Hood Red ink on Very Vanilla card stock. I used a blender pen to color the heart Pink Pirouette, and then a 1" circle punch to punch out just the center of the image. I layered it on a 1 1/4" Riding Hood Red circle and tied it to the candle with Riding Hood Red Taffeta Ribbon. So easy. :-)


Tomorrow I will have another Valentine's project with a tutorial, so check back!

Stamps: Love You Much
Ink: Riding Hood Red, Pink Pirouette
Paper: Riding Hood Red, Candy Land Designer Paper
Accessories: Blender Pen, Riding Hood Red taffeta ribbon, 1" circle punch, 1 1/4" circle punch, 1/8" circle punch, candle (Ikea)

Wednesday, September 24, 2008

Big Shot Pillows


Well, I finally decided to get the Big Shot! If you are wondering what the Big Shot is, it is a personal die cut machine. So far I have been very impressed! I'll definitely be posting more projects in the future that use the Big Shot. If you want to see more about the Big Shot and the available products, click HERE or on the link in the right column of this page.

This project was another one we made at Technique Club this month. We ran the Designer Paper through the Big Shot using the pillow die and it comes out all cut and scored. Very cool! These make for really quick projects. Tie the ribbon around (*hint--you can tie the ribbon around the box when it is still flat--makes it a little easier) and then add the tag.

The tags use the faux metal technique. Stamp on Brushed Silver card stock with Versamark ink and then heat emboss with Silver Embossing powder. Then punch out with the new Curly Label punch. The sentiments were embossed with with Silver Embossing Powder and then punched out with the Small Oval punch and popped up with dimensionals on top of the silver tag. Fun little projects for Christmas or anytime!

Stamps: Curly Label Punch Bundle, Fundamental Phrases
Ink: Versamark
Paper: Bella Rose Designer Paper, Kiwi Kiss Patterns Designer Series Papers, Brushed Silver, Kiwi Kiss, Riding Hood Red
Accessories: Big Shot, Curly Label Punch, Small Oval Punch, Kiwi Kiss/Vanilla Satin Ribbon, Ridding Hood Red Taffeta Ribbon, dimensionals

Monday, September 8, 2008

Stationary Box Class


Come learn how to make these adorable stationary boxes! I will be holding a class to make these on Thursday, September 25th at 7:30pm. The original idea for these stationary boxes came from Jackie over on Addicted to Stamping. The link to her tutorial is HERE. Go visit her blog and leave her a comment so that she knows we appreciate her wonderful idea!

At my class, you can choose to make either the Bella Rose box (pictured above) or the Hawaii Papaya box (pictured below). The pictures show the box closed with the lid on, the lid off and the box open, and the cards, 3x3 cards, and tags that go in the box. The box also features an address book, postage stamp holder, and pen holder. With the holidays coming up, I think this is a perfect gift idea!

Class details:
--Thursday, September 25th at 7:30pm at my place
--Class Fee is $15 and includes everything to make one box (of your choice) and detailed instructions
**If you register AND pre-pay by September 18th class fee is only $13**
--Additional kits can be ordered for $12 each
--RSVP today to reserve your spot!

Class by Mail details:
If you can't attend or live far away, you can still participate! Kits can be ordered for $12, and shipping will be $5 (priority). If multiple kits are going to the same address, I will of course combine shipping. The kit will have everything cut, scored and ready for you to stamp and assemble. All of the accessories (ribbon, brads, etc.) are included, and I will email you the pdf file with the instructions.

If you make these on your own, listed below are the supplies you will need in addition to the kit. Let me know if you need to place an order for some or all of these items.

Bella Rose Box:
Dream du Jour stamp set ($18.95)
Pink Pirouette stamp pad ($5.25)
Chocolate Chip stamp pad ($5.25)
Riding Hood Red stamp pad ($5.25)
Rose Red marker ($3.25)
Certainly Celery marker ($3.25)
Scallop Edge Punch ($15.95)
Tag Corner Punch ($6.95)
Adhesives--You'll need a strong adhesive such as Mono or Sticky Strip and dimensionals

Hawaii Papaya Box:
Eastern Blooms stamp set ($18.66 if ordered before Sept 30th, $21.95 after)
Versamark stamp pad ($7.50)
Tangerine Tango stamp pad ($5.25)
Chocolate Chip stamp pad ($5.25)
Scallop Edge Punch ($15.95)
Tag Corner Punch ($6.95)
One sentiment stamp of your choice
Adhesives--You'll need a strong adhesive such as Mono or Sticky Strip and dimensionals

Friday, September 5, 2008

Faux Embrace


Although I actually designed this card a while ago, I just finished making some more of these a few days ago for a special order that I had from a friend. Since I had everything out, I thought I would take a few pictures of the process. This card showcases the faux silk technique. I first saw the faux silk technique over on Splitcoaststampers, and just had to try it out. There is a great tutorial HERE. If you haven't ever tried faux silk before, you should as it is really quite simple, and the results are very elegant! Begin by stamping (and coloring if desired) on a piece of tissue paper. A couple of hints--start with a piece of tissue paper that is slightly larger than what you want the finished size to be. Also, when you stamp/color on the paper, make sure there is scratch paper underneath as it will bleed through. Here I used Basic Gray ink to stamp the image from the set Embrace Life, and then colored with a Lavender Lace marker.
Next, crinkle your tissue paper into a little ball and then carefully open it again. Take your glue stick and completely cover your piece of card stock. Adhere the tissue paper to the card stock. You'll want to smooth the tissue paper a little to make sure it sticks, but don't smooth out all the wrinkles as that is what gives the silk look. Trim the excess tissue paper.
Add you desired embellishments. Here I layered the Whisper White card stock onto Basic Gray and then added the Basic Gray Taffeta ribbon, Hodgepodge Hardware frame (now retired), and the sentiment. The sentiment is from the set Fundamental Phrases. I stamped the sentiment first and then used the Small Oval Punch to punch it out.
This card also has a unique fold to create a pocket on the inside. I did not come up with the idea for this particular type of unique fold. I know they showed this unique fold at at least some of the Stampin Up regionals this year. Anyway, to make the base of the card, start with a 4" by 12" piece of Lavender Lace paper. Score at 4" and 8", and then score diagonally connecting the lines. The black lines show where I scored.
Next, fold the right side of the paper down, so that it goes behind the rest of the card stock. You'll want to adhere the two triangles together. Then, fold that bottom section up and use a very small line of adhesive to glue the left side of the right (back) panel to the middle of the card. This creates the pocket. It sounds confusing, but once you try it, it is actually quite easy!
Then add the front to your card (the faux silk panel) and a note to go in the pocket. This also works really well as a nice way to give a gift card!

Stamps: Embrace Life, Fundamental Phrases
Ink: Lavender Lace, Basic Gray, Lavender Lace marker
Paper: Lavender Lace, Whisper White, Basic Gray
Accessories: tissue paper, glue stick, Basic Gray taffeta ribbon, pewter HPH frame, Small Oval Punch, Round Tab Punch, sponge
Technique: Faux Silk, Pocket Card


Monday, August 25, 2008

A Butterfly Kiss

One more card with the kissing technique! This is another card that we made at my Technique Club class. Here I took the solid butterfly from the new set Flight of the Butterfly and began by inking it with Pale Plum. I then ‘kissed’ with the Sanded background that was inked with Perfect Plum. Then I used Basic Gray to stamp the dotted butterfly over the top.

I used the sanded background again (inked with Perfect Plum) on the Pale Plum layer. The 3 brads are the Pewter brads from the Vintage brads set. Both this layer and the butterfly layer are up on dimensionals.

And for the finishing touch. . . Ever since I saw Shelli show how to gather ribbon on Main Stage at Convention, I knew I wanted to try! So I used her technique with the Basic Gray taffeta ribbon. I added a couple pictures to show how this is done.

Begin by pulling the ribbon apart just a little at one end. Keep separating until you can find one (or two) little threads. Very gently pull the individual thread while gently pushing down on the ribbon so that it starts to gather. Keep working until it is as gathered as you want it to be. I used Sticky Strip to attach the ribbon to the card.

Stamps:Flight of the Butterfly, Sanded BG
Ink: Pale Plum, Perfect Plum, Basic Gray
Paper:Perfect Plum, Pale Plum, Whisper White
Accessories:Basic Gray taffeta ribbon, pewter brads, dimensional, Sticky Strip
Techniques:Kissing, ribbon gathering